Looking for environmental education experiences while at home?
Below you will find activities and resources for families. Check out the hands-on lesson plans for a more in-depth look. Topics range from Ponds and Forest Habitats to EcoArts and Native Wildlife. See our Videos Tab under Education for fun, informative nature-themed videos for all ages!
Animal Coloring Pages
Activities

Meet a Tree
Get to know the trees near you! For this activity you will need a blindfold or bandana, a partner, and a couple of trees to choose from. Decide who will be the leader first and who will be the one blindfolded.
1.) The leader will blindfold their partner, spin them around a couple of times, and place their partner’s hands on their shoulders so they are in front of them to guide them. The leader will pick out a tree nearby to lead the blindfolded to. Remember to walk slowly and watch out for any tripping hazards and you lead your partner.
2.) Once the blindfoldee is at the tree, they are to “meet the tree” by using their sense of touch. Characteristics they should explore (without taking off their blindfold!) include: size of the tree, texture of the bark, number and size of branches, leaf characteristics, any notable uniqueness such as knots or holes, or sticky sap.
3.) When they are done, the guide leads them back to starting point and removes their blindfold.Their partner must now guess and decide which tree they “met” based off of their findings. Kids can play the ‘hold and cold” game if they are having difficulty finding the tree they “met.” Once they guess the correct tree, switch places and now the leader becomes the one blindfolded.
At the end, discuss the similarities and differences between the trees. Additional resource: A Key to Common Trees in Alabama

Sound Map
Sound Mapping is an engaging activity focused on using your sense of hearing. To play, use a piece of paper with an ‘X’ marked in the center, and with the date and time in the corner. The paper is a sound map and the ‘X’ represents where you are sitting. When you hear a sound, make a mark on the paper to represent the sound. Your mark can be a simple design, such as a few wavy lines representing a gust of wind, or a musical note indicating a singing bird. Making simple marks keeps the focus on listening rather than on drawing. If you are unsure of the source of the sound, draw a question mark. The location of the mark should indicate the direction and distance of the sound from your seat.
Close your eyes while listening. To help increase hearing ability, you can make “fox” ears by cupping your hands behind your ears. This hand position will create a greater surface area to capture sounds. Then cup the hands in front of the ears (palms facing backwards) to hear the sounds from behind them more easily. Listen for urban sounds and sounds of nature.
This activity can be done daily or weekly, compare your maps as you go! When you are finished think about all of the sounds in nature. How to sounds help animals communicate? How does changing the envrionment and habitat change the sounds?

Mothing
Have you ever noticed how bugs including moths are attracted to a porch light? Grab an old, white sheet and hang it up near a light! You can use rope or clothespins to hang up your sheet. As the sun sets, turn on your porch light and watch all of the insects that start congregating. You may find cicadas, craneflies, and beetles in addition to moths. You can use Seek by iNaturalist.org to help with identification. If you want to get really fancy, use a black light set-up!
Entomologists aren’t sure why moths are attracted to light. One theory is that lights at night blind moths by swamping the light receptors in their eyes and disorienting them. Other theories involve confusing man-made lights for the Moon. Here is a great resource for more information on mothing - National Moth Week

50 Inch “Hike”
This activity allows students to explore a small area and see what evidence of life they can find. This activity can be done in your backyard, or even on an area of sidewalk near your home. It will allow us to look at habitats on a much smaller scale - 50 inches!
Materials: a string or cord measured out to be 50 inches. This will be your boundary for discovery.
1.) Lay the string along any area outside. Where you have placed the string, is where you are exploring. You can also place the string in a circular fashion and investigate everything inside the circle.
2.) Look at logs, leaves, twigs, cracks and crevices for evidence of organisms. Make sure students do not touch anything (especially ants, spiders, centipedes unless approved by an adult).
3.) A magnifying glass allows students to look at everything up close. Or organisms can be placed in bug jars or old tupperware containers for further observation.

Create a Creature
Use your imagination to create the ultimate creature! Think about the coolest adaptations that organisms use for survival. Examples are camouflage, venom, nictitating membrane (3rd eyelid), gills, feathers, nocturnal vision, a hard shell and migration! Adaptations can be physical or behavioral characteristics that help organisms survive.
Create your very own animal, plant or creature that has all of your favorite adaptations. Be creative and invent a name (common and scientific), habitat and diet for their creature. Draw your creature or write a short story about them. If more materials are available, use pipe-cleaners, play-doh/clay, googly eyes, recycled cardboard, construction paper, etc. to create your creature.
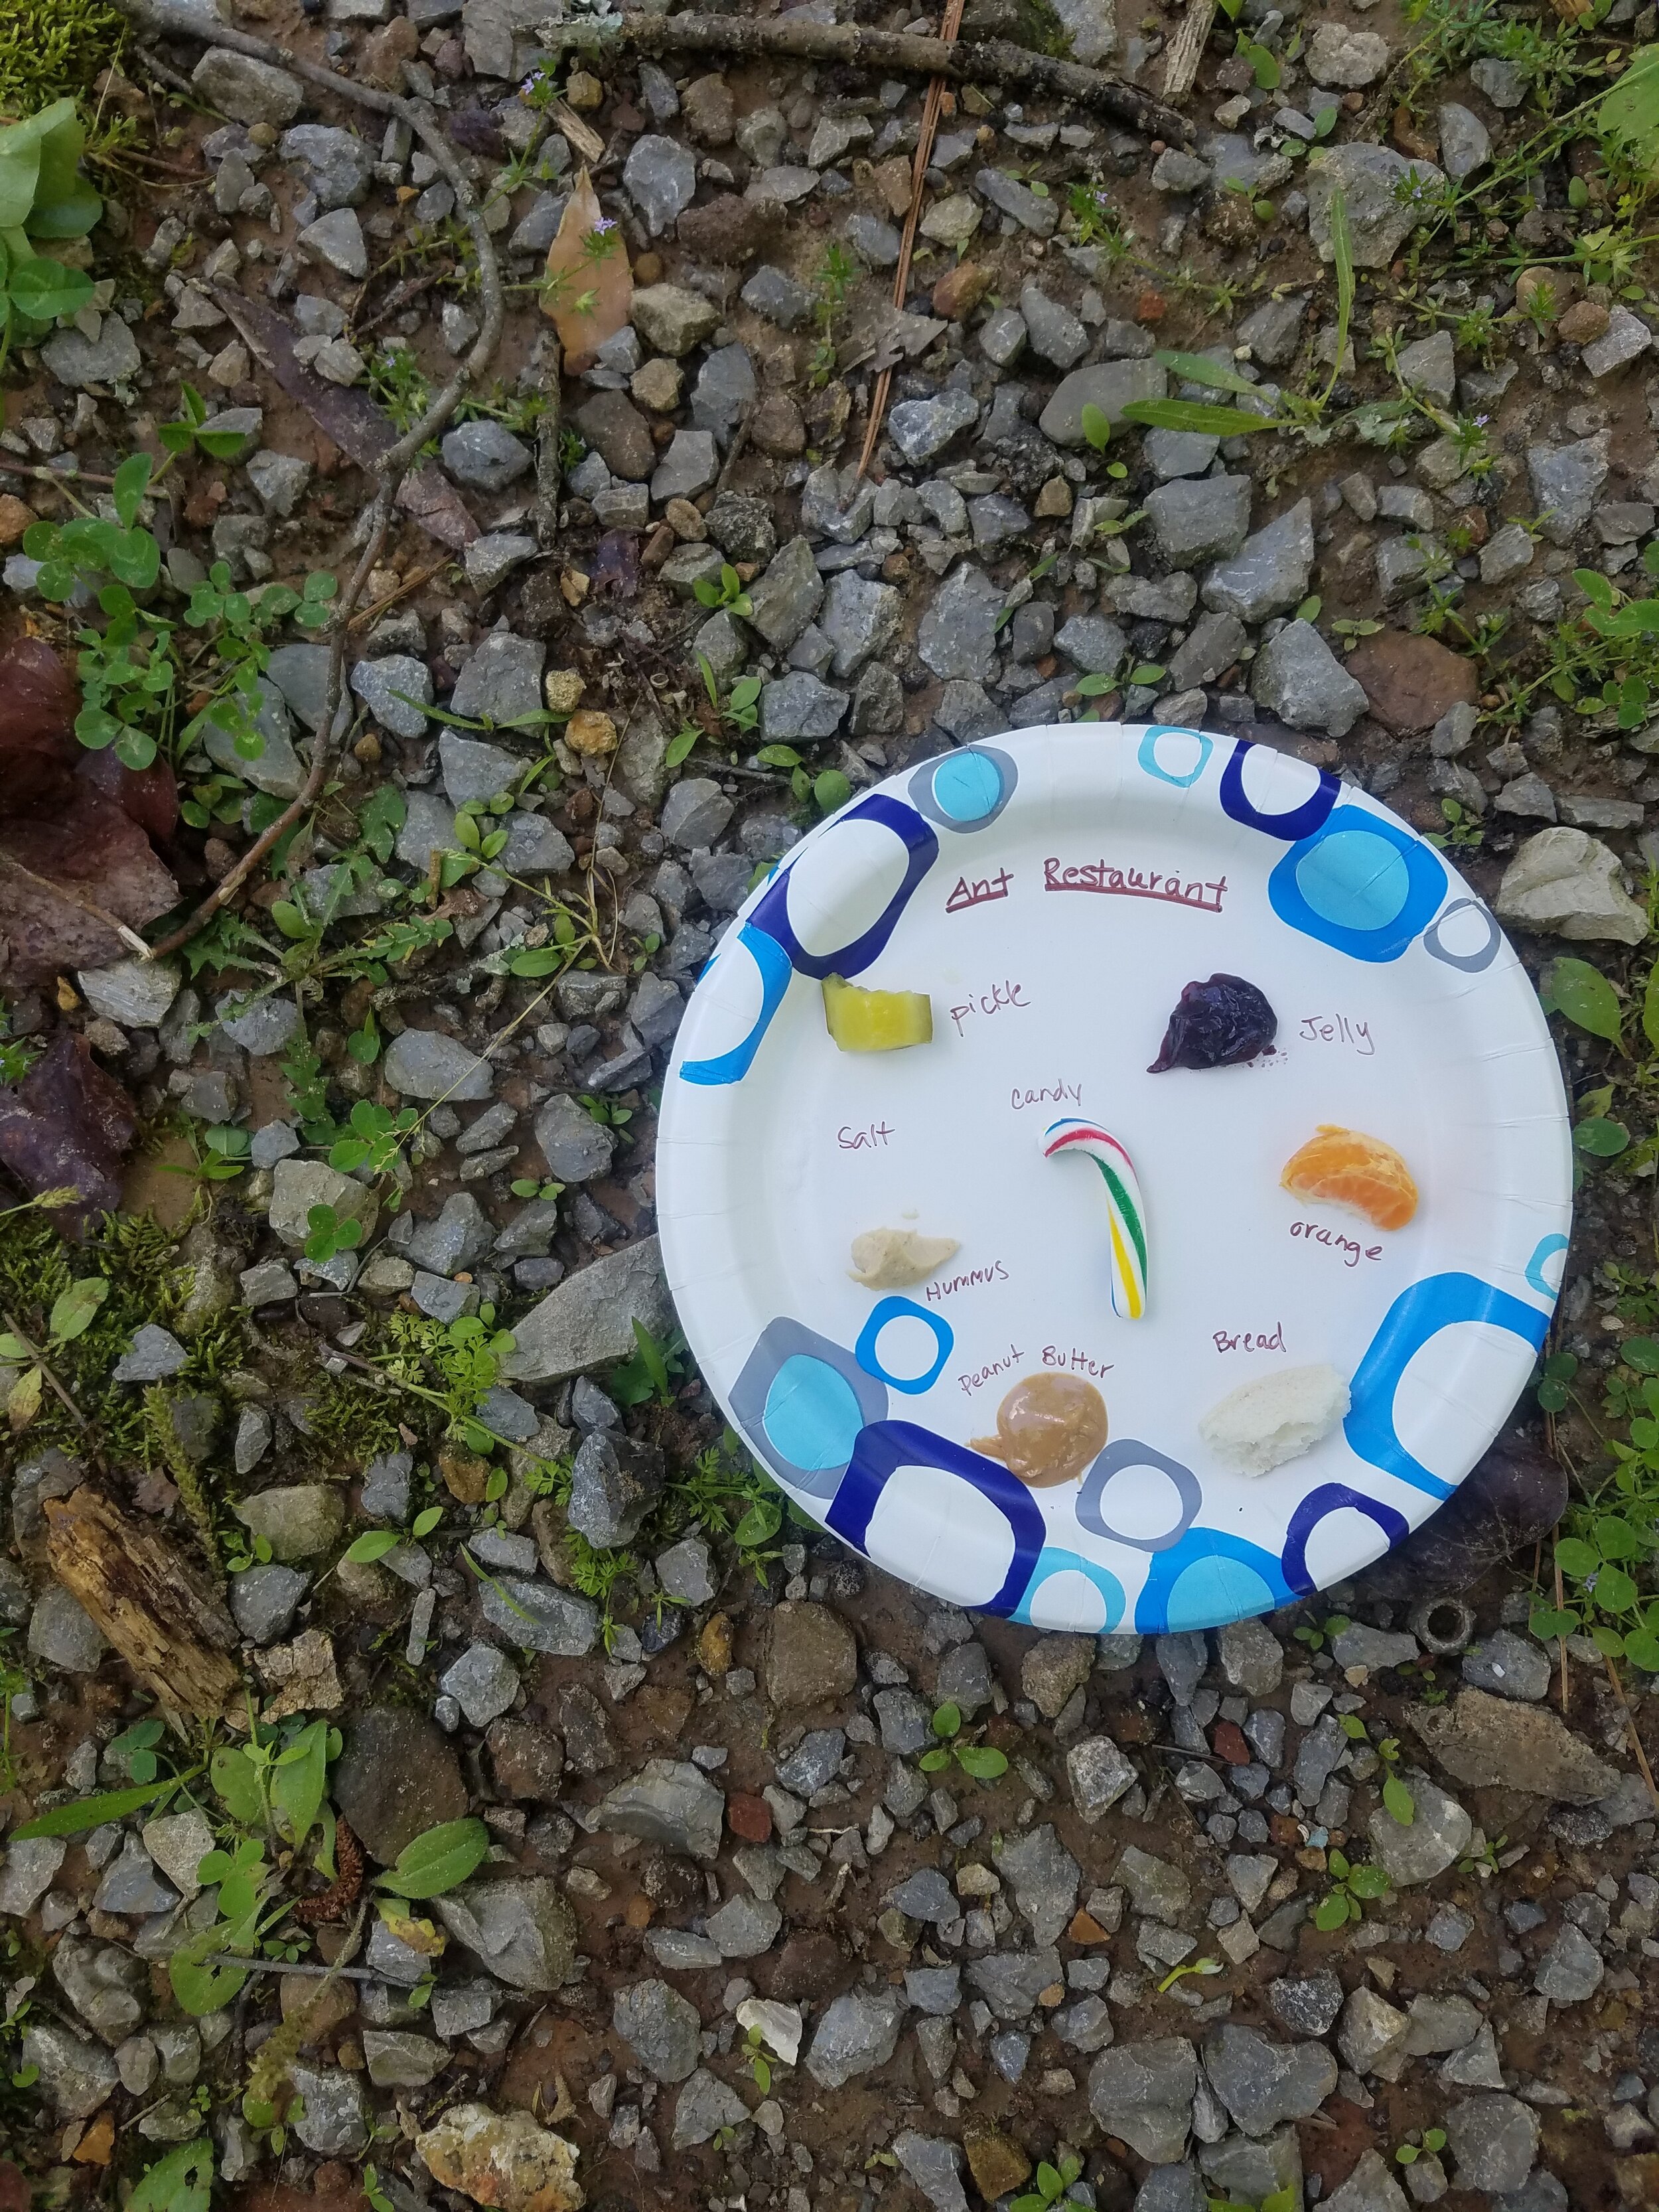
Ant Restaurant
Have you ever had a picnic lunch, only to have been met by ants wanting to carry your food away? In this activity we will explore the world of ants, who have 4 to 5 times more odor receptors than most other insects!
Materials: Paper plate, food scraps
1.) Save a variety of food scraps from your house to place on a paper plate. You can use household food items such as honey, salt, sugar, and spices, or use lunch items such as crackers, candy, fruit, and vegetables. Place your food items on the plate in clusters.
2.) Students make hypotheses regarding which food will attract the insects. Rank the food items that they predict to be most popular to least popular.
3.) Leave the plate outside on the ground for an extended amount of time (but not overnight). Be sure to place rocks or a paper weight on the plate if it is a windy day.
4.) Observe if your plate attracts any ants, and if your hypotheses were correct! Resources for more information on Ants - National Geographic - Ants

Bug Shake
While we typically have bushes and shrubs in our backyards and neighborhoods, we often miss out on the insects that utilize these plants for their habitat. For this activity we will use an old white or light colored bed sheet and a bug jar or tupperware container if you have it.
1.) Place the white sheet on the ground underneath a bush, shrub or small tree nearby. Helpful hint: pick one that has chewed up leaves or evidence of insects.
2.) GENTLY shake the shrub by the limbs or from the middle, while standing to the side. Watch insects drop from the leaves and limbs onto the sheet you have on the ground. Leaves may drop on the sheet as well, which can be investigated too!
3.) Use insect books or the Seek App by iNaturalist.org to help you identify the insects you have found. Optional: Choose one insect to safely place into a container with a lid for further observation. Some of these bugs may include spiders, so please be careful. Most bugs are easier to observe directly on the sheet, without handling.
Think about how different plant species are host plants to different insects and how that might impact what you found. Be sure to return all insects to their habitat!
